The Roof
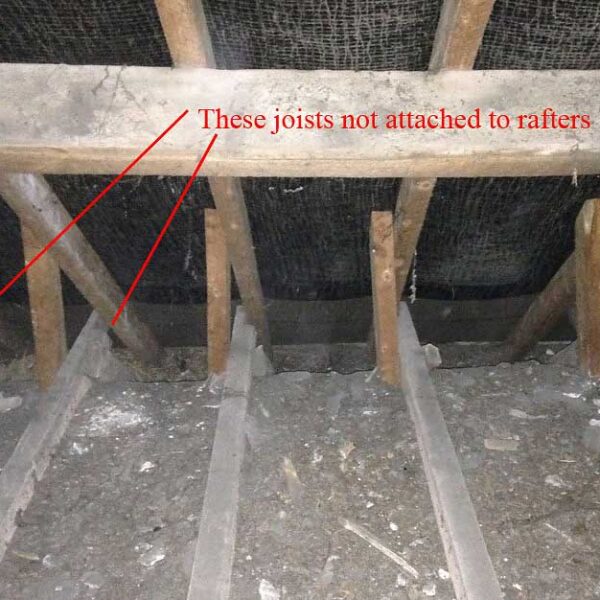
On the top floor at the front of the house, the ceilings are noticeably sagging. A quick look in the loft revealed the reason for this. Most of the joists are 2” by 4” but in places, they are not even as deep as this and one joist in particular was only 2”x2”. Considering these are spanning 4 metres, it’s not surprising that they are dipping in the middle. There was another more serious problem picked up in the survey though. Some of the joists were not attached to the rafters. Without this attachment to tie in the rafters and complete the stable triangle of weight distribution, the rafters could spread under the weight of the roof and cause damage to the walls. The suggestion in the survey was to pull down the ceilings, remove the existing joists and replace them with ones that are deep enough (at least 2”x6”) and finish with plasterboard. This seemed a bit of a heavy handed suggestion to me with several downsides including:
- Loss of historic building fabric
- Nightmare, filthy job pulling down a lath & plaster ceiling
- Unnecessary expense of new ceiling materials
- Loss of character
This last point was particularly important to me. I love the wobbly character in this house and the sagging ceiling is an important part of that (I’ll write about my opinions on the aesthetic of age when I have a bit more time). Replacing this with a straight, plasterboard ceiling was not an appealing option. Thanks to some helpful advice from my architect friend and a useful picture in my Old House Handbook (a brilliant resource), I came up with a plan that would solve all the structural problems in the roof but would mean I could keep the original, sagging, lath and lime plaster ceiling. This was simply to tie the rafters using new additional joists above the existing joists, and strap the exiting joists to these to prevent further sagging. It went a bit like this:
- Access. It would be impossible to get 4m long joists into the roof space through the house so they’d have to come in through the roof. My neighbour kindly lent me his scaffold tower which was obviously an essential component when working at this height.
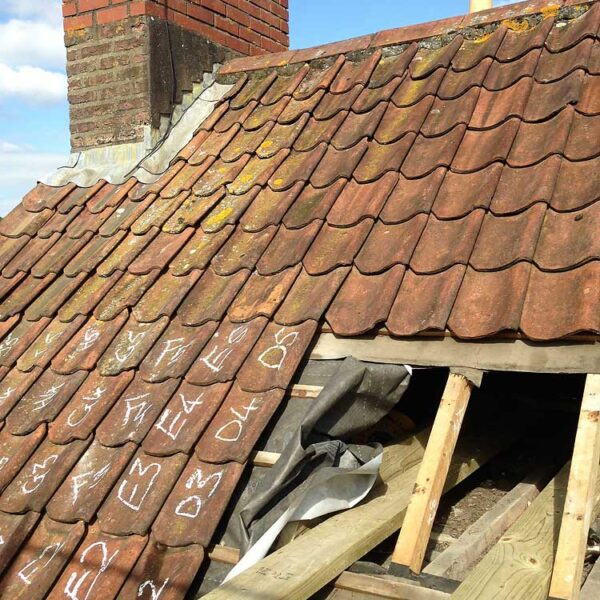
- Opening up the roof. The first job was to number the tiles so they could be put back in the right place. This is a pantile roof and it’s knocking on a bit, so the tiles have weathered in situ and would likely not fit as well if moved around. It’s then a fairly straight forward if laborious task to lift the first section of tiles off and stack them somewhere in a logical manner. I then cut through the wooden battens and the roofing felt creating a hole 2 rafters wide and about 1m high. I was in! Now for the tricky bit. The idea was to step off the scaffold into the roof space and then work along the roof stripping off the tiles, cutting the battens and roof felt every 2 rafters and sliding in the joists, using their overhanging ends where they poked out of the roof as an additional working platform for extra security when working at the far end of the roof away from the scaffold tower.
- Fitting joists and closing the roof. Working my way backwards from the far end of the roof I worked in 2 rafter sections attaching the joists (using 2x10mm coach bolts at each end), then closing up the roof with new breathable membrane and replacing the battens and tiles for that section. This was pretty fiddly and required me to contort myself into all sorts of positions while lying on 2 inch wide beams, a process that rendered me pleasantly physically exhausted at the end of each day, but ultimately it worked! The joists were in and attached, and the roof was closed and water tight again.
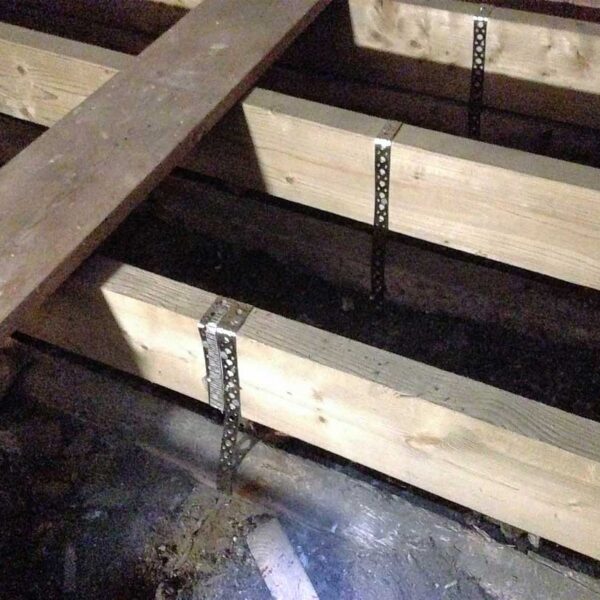
- Strapping up the old joists. I used 20mm wide stainless steel banding. On the 2 very shallow joists, I passed this under the joist between the joist and the laths. This was essentially prising the lath away from the joist a tiny bit which I wasn’t that happy doing, but the laths were well attached to the joists and the plaster pretty firmly pricked-up between the laths, so I was confident the ceiling could take this minor disturbance just for these two joists. The rest of the joists were deep enough for me to screw the banding to the sides without having to pass underneath. The idea was to hold the original joists in situ and prevent further sagging, not to hoist them up to the new, straight joists above.
- Insulation. Finally, I was able to lay 240mm of sheeps wool insulation, which is lovely stuff to work with and has made the house much warmers and quieter.


Sorry, the comment form is closed at this time.